Preparing Azure for a Zerto Cloud Appliance Installation – Part 1: Resource Groups
In this series of blog posts, we will create the elements needed to get the Zerto Cloud Appliance (ZCA) installed and ready to connect to an on-premises site.
The four components Zerto needs in order for you to use Azure are:
- Resource Groups
- Networks
- Firewalls
- Storage
You can see how Zerto consumes the Azure components in this quick tip post. We will start logged into the Azure portal. Then we will create the components needed to get the ZCA installed.
Before we start with the Resource Group creation, be sure the Azure account you use has Owner permissions for the Azure subscription you will be using. While the default owner permissions will allow the ZCA to be successfully installed, I have seen in some environments where the Azure Active Directory administrator removes adding Azure application permissions for infrastructure administrators. The Zerto Cloud Appliance registers as a Web/API application in Azure during the installation so the account you use should have these Azure AD permissions.
Resource Groups
The first thing we want to do is create a Resource Group. Resource Groups are like virtual datacenters in Azure. You can create as many Resource Groups as you need and then place networks, subnets, storage and firewalls in the Resource Group. For more on what Resource Groups are, see this article.
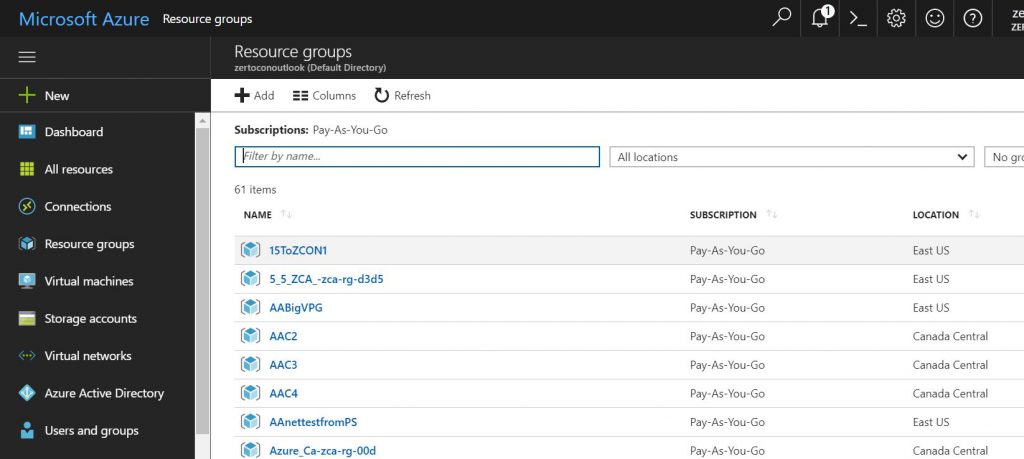
From the Azure Portal navigation menu on the left, go to Resource Groups and create a Resource Group by clicking +Add.
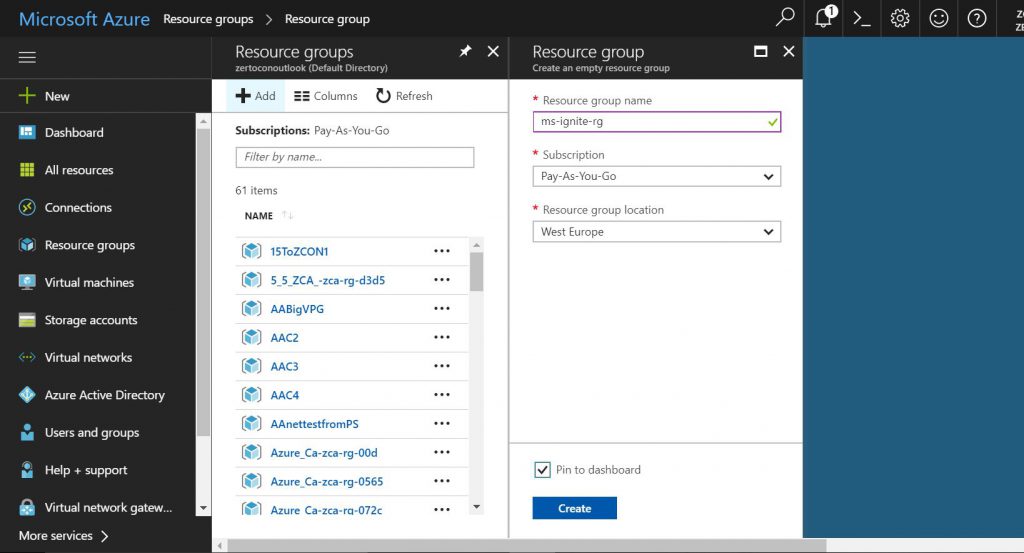
I’m calling mine ms-ignite-rg since I’ll use this as a demo environment during Microsoft Ignite. For more than you want to know about naming conventions for Azure resources, see this article.
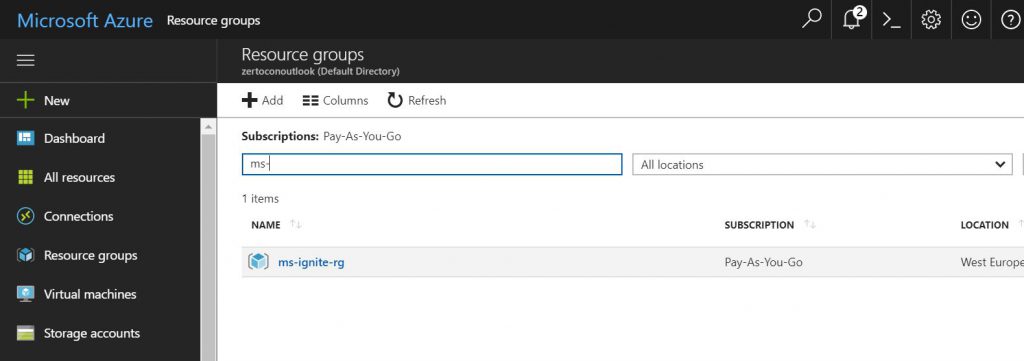
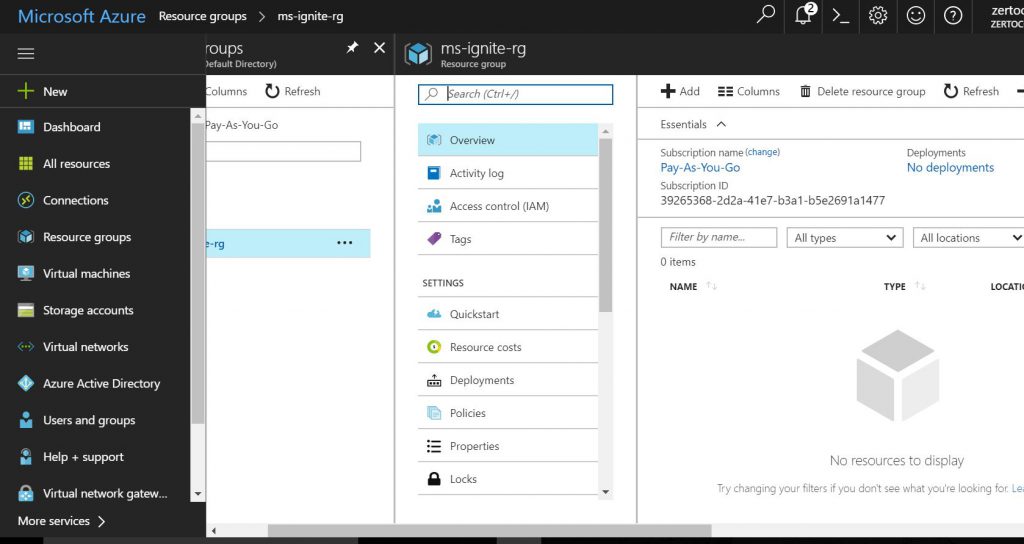
Once the Resource Group is created, you can find it on the Dashboard or you can go back to the Resource Group blade and search for it.
Click on the Resource Group to go into it. It will be empty and ready for you to add networks, subnets, network security groups (firewalls) and virtual machines.
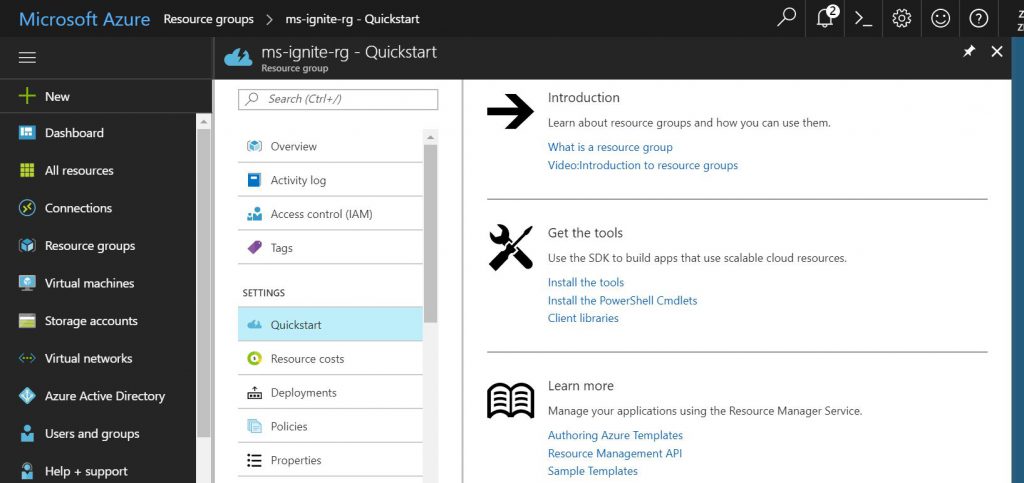
Azure is really good at training you along the way. In the Resource Group menu, go down to Quickstart under Settings to learn more about Resource Groups and even watch a video. When you are done. Click the X to close the Resource Group blade.
In the next post in this series, we’ll create the Networks and Subnets.
– Shannon Snowden, Senior Technical Architect at Zerto. Shannon focuses on two primary areas: develop and articulate the technical product message and develop strategic business partnerships with key technology vendors and service providers. Also a regular speaker at events, podcasts and webinars. He has been a delegate for Tech Field Day and a judge for Best of VMworld.